Pre-Departure Checklist: What to Check Before Hitting the Road with Your Motorhome
Introduction
Starting a motorhome trip without checking the status of the main systems is like driving a car without tires: possible on paper, disastrous in practice. A structured pre-departure checklist is not just a matter of safety, but also of peace of mind during the journey and the prevention of costly emergency repairs.
This guide will take you through a systematic verification of all the critical components of your motorhome, organized by technical category. Dedicate 30-45 minutes to this procedure before every major departure (long trips, season changes, after long storage). For short weekends or local moves, you can use a “light” version of the checklist.
Important note: This checklist is recommended for motorhome owners with basic knowledge. If you are unsure how to perform a check, contact a specialized technician.
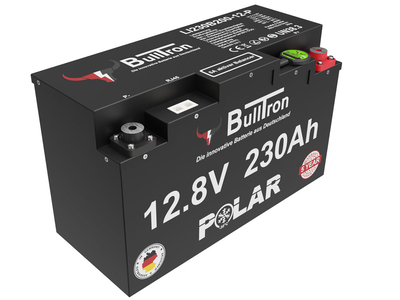
1) Battery System and Energy Storage
Visual checks
- Inspect the battery terminals: they must be clean and free of oxidation (white/blue deposits)
- Check the connection cables: they must not have cuts, fraying, or loose connections
- Verify that the battery is securely fastened in its housing
- Look for any fluid leaks around the battery (a sign of internal damage)
Functional checks
| Check | How to do it | Expected result | If it fails |
|---|---|---|---|
| Battery voltage | Use a multimeter on the terminals (+/−). With engine off: 12V or 24V nominal | 12V = 12.0-12.8V (charged); 24V = 24.0-25.6V | If below 11V or 22V: battery discharged or faulty |
| Load test | Turn on interior lights for 5 minutes, then measure voltage | Maximum drop 0.5V; then it stabilizes | If it drops below 10.5V: compromised capacity |
| Charger operation | Turn on the charger and monitor the incoming current | It must read positive current (at least 5A) | If zero: broken charger or battery at end of life |
Recommended frequency
- Every departure: Visual checks + voltage
- Every 3 months: Terminal cleaning + load test
- Every 12 months: Charger inspection + deep capacity test
2) 12V/24V Electrical System and Loads
Visual checks
- Verifica i quadri elettrici: le centraline non devono avere segni di bruciature o fritture
- Ispeziona i cavi visibili: cercate corrosione, tagli, connettori allentati
- Controlla le prese 12V: non devono avere gioco eccessivo o contatti ossidati
- Guarda gli interruttori: devono scattare nettamente senza resistenza anomala
Functional checks for main loads
| Load | Check | Notes |
|---|---|---|
| Interior lighting | Turn on all lights; they must illuminate fully without flickering | If flickering = possible loose connection or low battery |
| Refrigerator | Turn on 12V mode and verify after 10 minutes that it is cooling | If not cooling: faulty compressor or clogged cooling pipe |
| Water pump | Turn on the pump and verify that water flows out normally | If weak: possible clogging or low battery voltage |
| Ventilation/Extractor fan | Turn on and verify that air is exhausted from external vents | If no airflow: dirty filter or faulty motor |
| Auxiliary heating | Turn on and check if heat reaches the rooms after 2-3 minutes | If cold: check fuel and control unit |
Recommended frequency
- Every departure: Quick lighting test + main loads
- Every 6 months: Complete wiring inspection + contact cleaning
3) Impianto Riscaldamento
Visual checks
- Inspect the boiler/heater exhaust: it must be clean and free from obstructions
- Check the fuel tank: check the level and ensure there are no leaks
- Look at the boiler connection pipes: they must not have cracks or detachments
- Check that the boiler’s fresh air intake is clear
Functional checks for main loads
- Gas boiler: Turn it on and verify that the flame ignites within 30 seconds. Heat must reach the rooms within 5-10 minutes
- Auxiliary heater (Webasto/Eberspächer): Turn it on from the control panel, check if the fan activates and heat comes out of the vents
- Thermostat: Set a temperature and verify that the boiler turns on/off automatically
Recommended frequency
- Every departure in cold season: Ignition test + heat distribution
- Every 12 months (before winter): Burner cleaning + seal gasket check
- Every 2 years: Full professional boiler service
4) Air Conditioning and Ventilation
Visual checks
- Check the external air filters: if they are gray/black, they must be cleaned or replaced
- Inspect the ventilation vents: they must be free from obstructions
- Check the air conditioning condensate drain pipes: they must be clear
- Look at the A/C compressor: it must not have oil leaks around the fittings
Functional checks for main loads
- Natural ventilation: Open the skylights/windows and verify that air circulates
- Extractor fan: Turn it on and place a sheet of paper in front of the intake: it should be sucked in (circulation test)
- Air conditioning (if present): Turn it on in cooling mode and verify that cold air comes out of the vents within 2-3 minutes
- Humidity: After 30 minutes of A/C use, check that the condensate drains correctly
Recommended frequency
- Every departure: Visual inspection of filters + fan test
- Every 3 months: Air filter cleaning
- Every 12 months (before summer): A/C refrigerant check + coil cleaning
5) Braking System
Visual checks
- Inspect the brake pads: they must have at least 3-4mm of thickness
- Check the brake discs: they must not have deep grooves or irregular wear
- Check the brake fluid reservoir: the level must be between MIN and MAX
- Look at the color of the brake fluid: it should be transparent or slightly yellowish (if dark brown = old, replace)
- Inspect the hoses: they must not have cracks, bulges, or leaks
Functional checks for main loads
- Test braking: In a safe area, accelerate to 30 km/h and brake gently: the camper must slow down uniformly without vibrations
- Emergency braking: Still in a safe area, brake sharply: the camper must not swerve
- Pedal: It must feel firm and return on its own. If it sinks = air in the circuit
- Brake warning light: Verify that the brake warning light is not illuminated while driving
Recommended frequency
- Every departure: Visual inspection of pads + fluid level
- Every 6 months or 10,000 km: Complete braking test + disc inspection
- Every 2 years: Brake fluid change (hygroscopic, absorbs moisture)
- Every 3-4 years: Complete braking system overhaul (specialized workshop)
6) Plumbing and Sanitary System
Visual checks
- Inspect the fresh water tank: look for cracks or leaks
- Check the grey and black water levels: they must have available capacity
- Check the connection pipes: they must not have kinks, cracks, or loose connections
- Look at the sink and shower drains: they must drain correctly
Functional checks for main loads
- Water pump: Open an internal faucet and verify that water flows with adequate pressure
- Domestic hot water: If a water heater is present, turn it on and wait 10-15 minutes: the water must become lukewarm/hot
- Drains: Open the faucets and verify that water flows out without backup or bad odors
- Isolation valves: If present, verify that they function and correctly isolate the tanks
Recommended frequency
- Every departure: Check tank levels + pump and drain test
- Every 3 months: Cleaning of pipes and tank vents
- Before long periods of storage: Drain tanks and add liquid antifreeze
- Every 12 months: Deep cleaning of pipelines + tank seal check
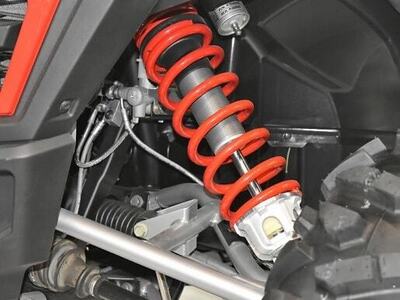
7) Suspension, Shock Absorbers, and Steering
Visual checks
- Inspect the shock absorbers: they must not have visible oil leaks
- Check the stabilizer bars: they must not have cracks or bends
- Check the tires (see dedicated section below)
- Look at the underbody: there must be no hanging or damaged parts
Functional checks for main loads
- Steering: Turn the steering wheel while stationary: it must not make abnormal noises. While driving, it must respond promptly without excessive play
- Suspension: Push the camper down at each corner: it should bounce 1-2 times and then stabilize
- Stance: The camper must sit level when parked. If it leans to one side = possible shock absorber damage
Recommended frequency
- Every departure: Quick visual inspection
- Every 12 months or 15,000 km: Full suspension and steering check (workshop)
- Every 2-3 years: Replacement of shock absorbers (progressive wear)
8) Tires
Visual checks
- Inspect the pressure: it must match the values indicated on the label on the door pillar (usually 80-90 PSI for campers)
- Check the wear: the tread must have at least 1.6mm of depth (legal limit), but 3-4mm is recommended for safety
- Look for cuts, cracks, or bulges on the rubber: these are signs of structural damage
- Check the age of the tires: even if they show little wear, elasticity decreases after 5-6 years
Functional checks for main loads
- Penny test: Insert a coin into the tread: if it is completely hidden = wear is OK; if it remains visible = urgent replacement needed
- Pressure consistency: Measure all 4 tires: they must not differ by more than 0.3 bar
Recommended frequency
- Every 2 weeks or before long trips: Pressure check + visual inspection
- Every 10,000 km: Tire rotation (different positions) for even wear
- Every 3-4 years or when tread depth drops below 3mm: Replacement
9) Lights and Signals
Visual checks
- Inspect all light indicators: front, rear, brake, and reverse lights
- Check the lenses: they must not have cracks or internal condensation
- Look at the reflectors: they must be clean and free of dirt
Functional checks for main loads
- Parking lights: Turn them on and verify that all of them illuminate
- Brake lights: Press the brake pedal and verify that all of them light up
- Turn signals: Activate them and verify that they flash regularly (1-2 Hz)
- Reverse lights: Engage reverse gear and verify that the white lights turn on
- Fog lights (if present): Turn them on and verify illumination
Recommended frequency
- Every departure: Quick test of main lights
- Every 6 months: Lens cleaning + full inspection
- If a light does not work: Replace immediately (legal requirement)
10) Exterior and Sealants
Visual checks
- Inspect the window seals: they must be free of cracks or detachment
- Check the roof: look for cracks, bulging, or signs of water leaks
- Check the doors: they must close easily and without excessive play
- Check the skylights: verify that they seal hermetically
- Inspect the bodywork: there should be no rust, dangerous dents, or cracks
Functional checks for main loads
- Door tightness: Close the door: there should be no drafts coming in
- Window tightness: Try blowing in front of windows and skylights: no air should enter
- Roof: If possible, climb on top and look for signs of sagging or hidden leaks
Recommended frequency
- Every 3 months: Inspection of seals and tightness
- Every 12 months: Deep cleaning of seals + application of sealant coating if necessary
- Every 2 years: Professional roof inspection + preventive repairs
Summary
Quick Pre-Departure Checklist
If you don’t have time for the full checklist, perform at least these 5 essential checks:
| No. | Check | How to do it | Time |
|---|---|---|---|
| 1 | Tires | Check pressure + visual wear | 2 min |
| 2 | Lights | Turn on all external lights | 1 min |
| 3 | Brakes | Test for smooth braking and no noise | 1 min |
| 4 | Battery | Measure voltage with a multimeter | 1 min |
| 5 | Main loads | Test interior lights + water pump operation | 1 min |
Conclusions and Final Tips
A systematic pre-departure checklist is not just a matter of road safety: it is an investment in your peace of mind and the longevity of your motorhome. Motorhome systems are complex and interconnected; neglecting a minor check can cause cascading failures during the trip.
PRO Tip: Create a printed copy of this checklist and keep it in the motorhome’s glove box. Check off each item as you inspect it: this method reduces oversights and creates a documented track record useful for professional servicing.
Final safety note: If you find significant anomalies during any of these checks (oil leaks, strange noises, electrical failures), DO NOT depart. Contact a specialized motorhome mechanic. Safety is worth more than any travel delay.
Safe travels!